Introduction
Installing a Ring doorbell can significantly enhance your home’s security, allowing you to monitor movements at your door from anywhere. Whether you’re upgrading from an older doorbell or you’re a first-time user, a ring doorbell installation can be accomplished easily, even if you’re not technically inclined. With real-time notifications and video streaming capabilities, a Ring doorbell offers peace of mind while adding convenience to your daily routine. This article provides a detailed guide on how to successfully install your Ring doorbell, ensuring you get set up quickly and start enjoying its features right away.
Why Choose a Ring Doorbell?
Enhanced Security Features
- Real-Time Monitoring: One of the most compelling reasons to install a Ring doorbell is the ability to see who is at your door in real-time.
- Two-Way Audio: Many Ring models come equipped with two-way audio capabilities, allowing you to communicate with anyone at your door, whether you’re at home or miles away. This feature is particularly useful for deliveries or unexpected guests.
- High-Definition Video: Ring doorbells provide high-definition video footage, affording clarity when monitoring the area in front of your home. Night vision features also ensure you can see what’s happening at night, enhancing security around the clock.
Smart Home Integration
- Compatibility with Smart Devices: Ring doorbells easily integrate with other smart home devices, enabling you to create a seamless security experience. You can connect your doorbell to security cameras and smart lighting for a comprehensive security system.
- Voice Assistant Control: If you own a smart assistant, such as Amazon Alexa or Google Assistant, you can connect your Ring doorbell and access its features via voice commands. This capability adds convenience and accessibility to your smart home setup.
Tools and Materials Needed for Installation
Essential Tools
Before beginning your installation, gather the necessary tools and materials to ensure a smooth process:
- Power Drill: A power drill is essential for mounting the doorbell securely to your wall or doorframe.
- Screwdriver: A Phillips-head screwdriver will likely be needed to attach your Ring doorbell to the mounting bracket.
- Measuring Tape: This tool helps ensure that the doorbell is installed at the right height and position.
- Level: Using a level guarantees that your doorbell is straight, providing an aesthetically pleasing look.
- Smartphone: You will need a smartphone to download the Ring app, which is crucial for setting up your Ring doorbell.
Preparing for Installation
Step 1: Download the Ring App
- Get Started: Begin by downloading the Ring app from either the App Store for iOS devices or Google Play for Android devices. This app will guide you through the entire installation process and allow for the management of your device.
- Create an Account: If you don’t already have an account, you will need to sign up. This step will give you full access to Ring’s features and services.

Step 2: Determine Your Installation Type
- Wired vs. Wireless: Decide if you’ll be installing a wired version (which connects to your existing doorbell wiring) or a battery-operated version (that can be mounted anywhere, requiring no wiring).
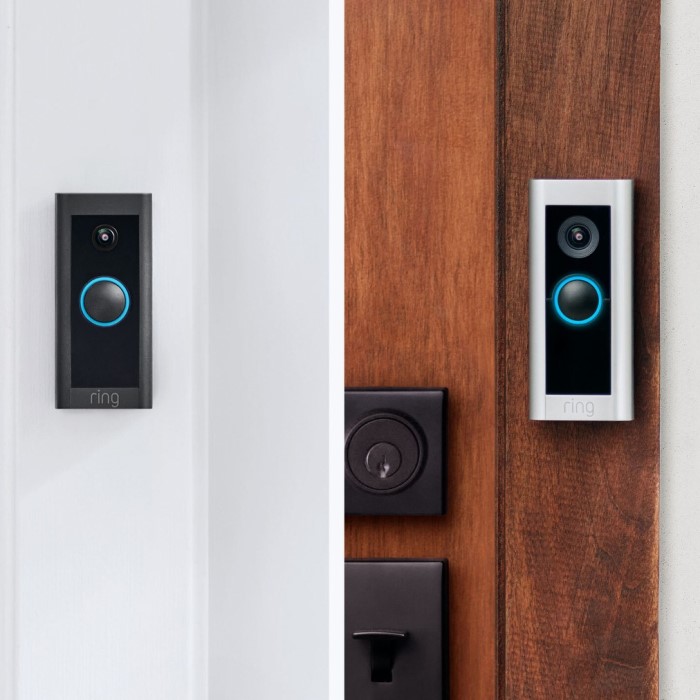
- Select Mounting Location: Choose an appropriate location for your Ring doorbell, typically around 4 feet off the ground for optimal camera angles. Ensure it is easily accessible for visitors and that it is in a location with a clear view of your property.
Step-by-Step Installation Guide
Step 1: Gather Equipment
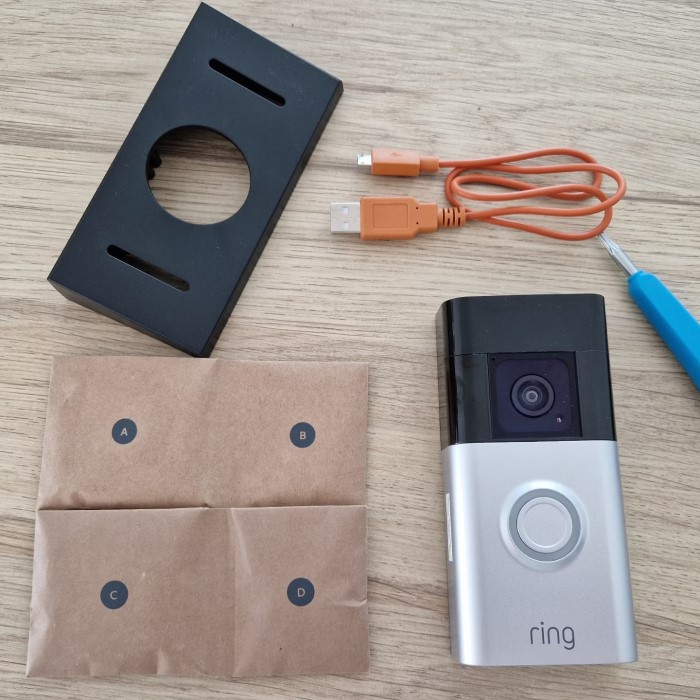
- Unbox Your Ring Doorbell: Take the components out of the package and ensure you have everything needed. The box should contain the doorbell, a mounting bracket, screws, a level, and user manual.
Step 2: Mount the Doorbell
Drill the Necessary Holes
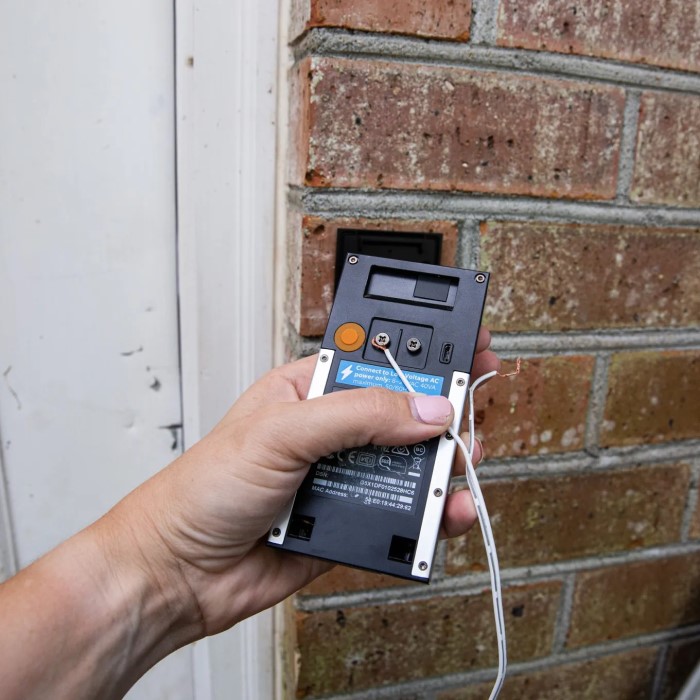
- Safety First: Before beginning any installation, the first step is ensuring safety. If you’re installing a wired doorbell, it’s crucial to turn off the power to the existing doorbell at the circuit breaker. This will help prevent any risk of electric shock during the installation process.
- Removing the Old Doorbell: Once the power is off, carefully remove the old doorbell from the wall. Most doorbells are secured with screws, so use a screwdriver to take them off gently. Be sure to disconnect any wires connected to the old doorbell.
- Marking Drill Locations: After removing the old doorbell, you’ll need to mark the locations for the new installation. It’s essential to determine the placement of the mounting bracket accurately. Measure and mark the positions where the screws will go based on the dimensions provided with the new mounting bracket.
- Creating New Holes: With everything marked, use a drill to create holes in the marked locations. If you’re transitioning from an old doorbell, ensure that the holes align properly with the new mounting bracket. It’s advisable to start with a smaller drill bit before expanding to a larger one, depending on the size of the anchors you will be using.
Position the Mounting Bracket
- Leveling for Accuracy: Positioning the mounting bracket requires precision. Take a level to ensure that the bracket will be straight. This is important not only for the aesthetic appearance of the installation but also for the functionality of the doorbell.
- Marking Final Placement: After ensuring it is level, use a pencil to mark where the bracket will be placed on the wall. These markings will serve as guides for where you will drill holes for the anchors.
- Drilling for Anchors: Drill holes in the marked locations if necessary, particularly if you are installing into drywall. Use the appropriate drill bit size according to the specifications of the anchors provided with your doorbell kit.
- Inserting Wall Anchors: If your installation requires anchors for extra stability—especially on drywall or soft surfaces—insert the anchors into the holes you just drilled. Make sure they are flush with the wall to support the weight of the doorbell effectively.
Secure the Bracket
- Attaching the Mounting Bracket: With the wall anchors in place, align the mounting bracket with the holes. Use the screws provided in the installation kit to attach the bracket securely to the wall.
- Tightening Carefully: As you fasten the screws, be careful not to overtighten them, which can damage the wall or strip the anchors.
- Double Check Stability: After the bracket is secured, gently tug on it to ensure it feels stable and does not wobble. A stable mounting bracket is crucial for the proper functioning of the doorbell and to avoid any future problems.
Attach the Doorbell
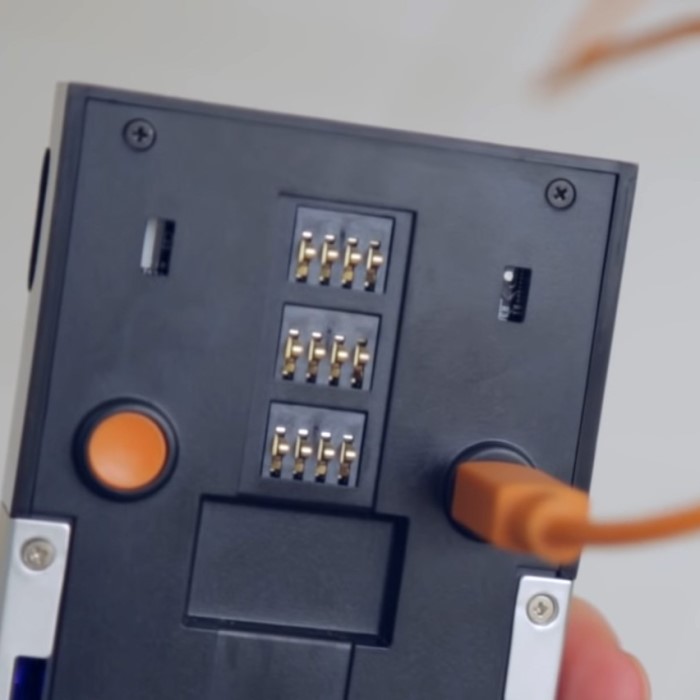
- Aligning the Doorbell: Once the mounting bracket is securely in place, take the Ring doorbell and position it near the bracket. You’ll want to align the connectors with the mounting mechanism on the bracket for a smooth attachment.
- Pushing it into Place: Carefully press the doorbell against the mounting bracket. You should hear a click, which indicates that the doorbell has securely locked into position.
- Final Checks: Once installed, give the doorbell a gentle push to confirm it is securely attached. After confirming the stability of the doorbell, you can then restore power to the unit. Following this, proceed to set up your doorbell through the app as needed.
Step 3: Connect to Wi-Fi
- Open the Ring App: After physically installing the doorbell, launch the Ring app on your smartphone.
- Follow Setup Instructions: The app will guide you through the steps for connecting the doorbell to your Wi-Fi network. Ensure you are in range of your Wi-Fi signal during this process.
Step 4: Test the Doorbell
- Functionality Check: After completing the installation and connection, check the functionality of the doorbell. Press the button to ensure it rings your app and activates alerts on your smartphone.
- Adjust Settings: Use the app to fine-tune your settings. Modify motion detection settings, adjust camera angles, and activate features such as notifications to ensure optimal performance.
Frequently Asked Questions
Do I Need an Electrician to Install a Ring Doorbell?
Typically, you do not need an electrician to install a Ring doorbell. Most users can complete the installation on their own by following the provided instructions. However, if you choose to install a wired model and are unsure about electrical work, consulting an electrician is advisable.
How Do I Install a Ring Doorbell?
To install a Ring doorbell, start by downloading the Ring app, then gather tools and materials. Choose an installation type (wired or battery-operated), mount the doorbell, connect it to Wi-Fi, and follow the prompts in the app for setup.
Can I Attach a Ring Doorbell Without Drilling?
Yes, for certain models, you can attach a Ring doorbell without drilling by using adhesives or specific mounting brackets designed for that purpose. Just ensure that the installation method chosen provides sufficient support for the device.
Is There a Monthly Fee for the Ring Doorbell?
While there is no mandatory monthly fee for using your Ring doorbell, opting for the Ring Protect Plan can enhance functionality. This plan offers features like video recording and cloud storage, albeit many basic functions remain free.
Conclusion
In summary, installing a ring doorbell is a straightforward process that can greatly enhance your home security and convenience. By following this guide, you will have successfully completed your Ring doorbell installation and begun enjoying its features. Whether enhancing your home’s safety, communicating with visitors, or simply monitoring your front porch, a Ring doorbell is an excellent addition to your smart home setup.