Understanding what grit whetstone for kitchen knives is essential knowledge for anyone who wants to maintain the sharpness and performance of their culinary tools. A whetstone, or sharpening stone, plays a critical role in the upkeep of kitchen knives, ensuring they remain effective, safe, and enjoyable to use. This guide will explore whetstone grit levels, their impact on knife sharpening, how to choose the right one, and techniques for achieving optimal sharpness for your kitchen knives.
The Importance of Knife Sharpening
Sharp knives are fundamental to safe and efficient cooking. Dull knives can lead to accidents, as users apply excessive force, which may cause slipping and injuries. Additionally, dull knives make food preparation more time-consuming and frustrating. Regularly sharpening your kitchen knives with the appropriate whetstone can greatly enhance your cooking experience.
A well-maintained knife not only performs better but also contributes to more precise cuts, allowing for better food presentation. Knowing what grit whetstone for kitchen knives is suitable for your specific needs is the first step in achieving optimal sharpness.
Understanding Grit Levels
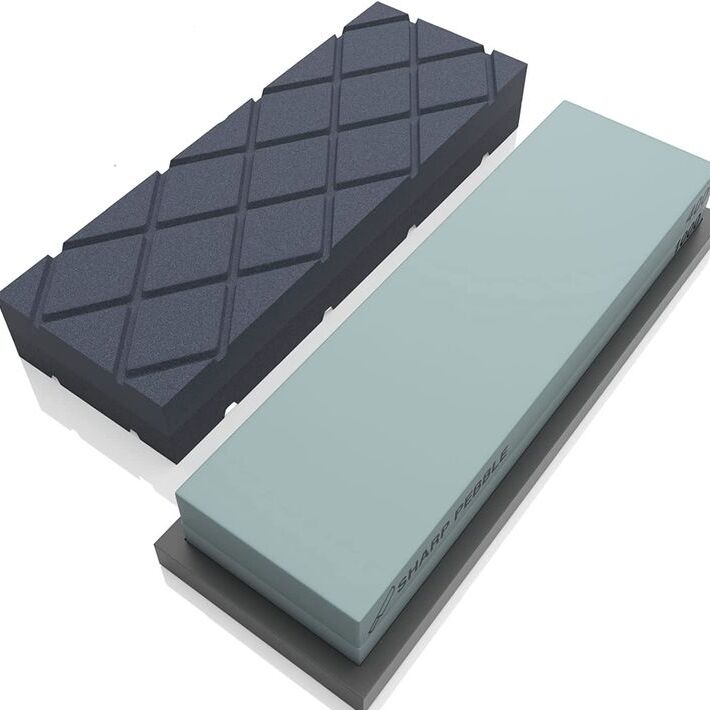
Whetstones come in various grit levels, and the grit number indicates the coarseness of the stone. The higher the grit number, the finer the surface of the stone. Here’s a breakdown of common grit levels and their applications:
1. Coarse Grit (100-400)
Coarse grit whetstones, within the range of 100-400, are designed for repairing damaged edges and shaping blades. If your knife is extremely dull or has nicks, a coarse grit whetstone is the place to start sharpening. It removes more material and provides a faster cut. However, it should not be used for regular maintenance, as it can remove too much steel from the blade.
2. Medium Grit (500-1000)
Medium grit whetstones, ranging from 500 to 1000, are used for general sharpening. These stones can restore a dull edge while allowing for some refinement. If your kitchen knives have lost their sharpness over time but are not severely damaged, a medium grit whetstone offers a balance between speed and smoothness, making it ideal for regular maintenance.
3. Fine Grit (1000-3000)
Fine grit whetstones, from 1000 to 3000, are perfect for refining the edge of the knife after using a medium grit stone. They create a sharper edge and are commonly used for honing knives. For your regular kitchen knives, a fine grit whetstone will help achieve precision and a polished finish.
4. Ultra Fine Grit (3000+)
Ultra-fine grit whetstones, typically above 3000, provide the final touch in sharpening. These stones are used to polish the knife’s blade and refine its edge to an almost razor-sharp finish. They are ideal for users who want an exceptionally fine edge on their kitchen knives, especially for delicate cutting tasks or professional use.
How to Choose the Right Grit Whetstone
When determining what grit whetstone for kitchen knives is best for you, consider the following factors:
1. Condition of Your Knives
Assess the current condition of your kitchen knives. If they’re severely dull or have damaged edges, start with a coarse grit whetstone. If they are simply losing their sharpness but aren’t damaged, a medium or fine grit should suffice.
2. Frequency of Use
Consider how often you use your knives. If you use your kitchen knives daily or for extensive cutting tasks, you may need to sharpen them more frequently using medium or fine grit whetstones. If you only use them occasionally, a good medium grit stone may be adequate for infrequent sharpening.
3. Type of Knives
Different types of kitchen knives may require different grit levels. Japanese knives, for example, often have a harder steel and benefit from finer grit stones. Western-style knives may require a combination of grit levels to maintain their edges effectively. Your knife’s design and intended use will influence the suitable whetstone grit.
4. Personal Preferences
Ultimately, the choice also comes down to personal preference. Some cooks prefer a sharper edge, while others may be satisfied with a moderately sharp one. Testing different grit levels can provide insight into what works best for you.
Techniques for Sharpening Kitchen Knives
After selecting the appropriate whetstone based on what grit whetstone for kitchen knives is suited for your needs, you can begin the sharpening process. Here are some steps to follow:
1. Preparation
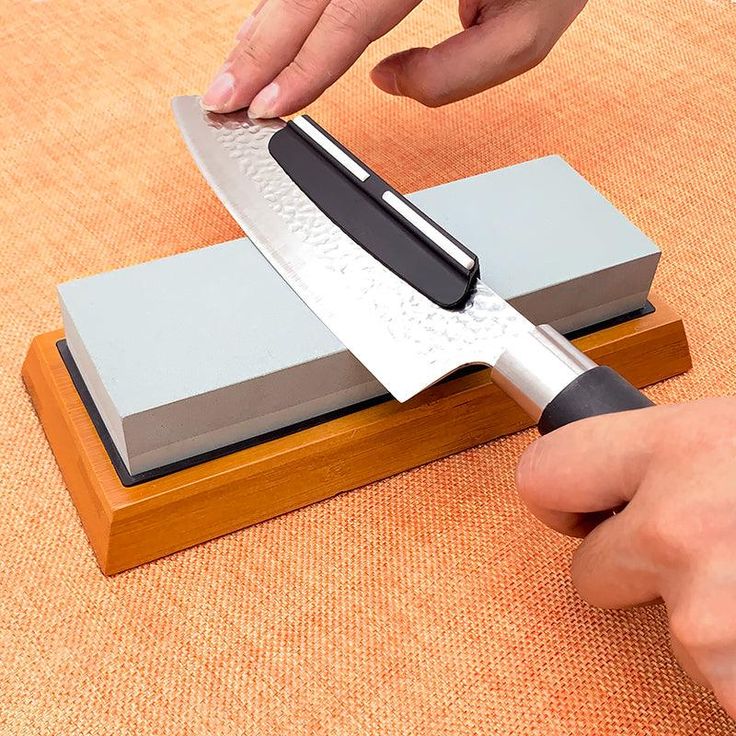
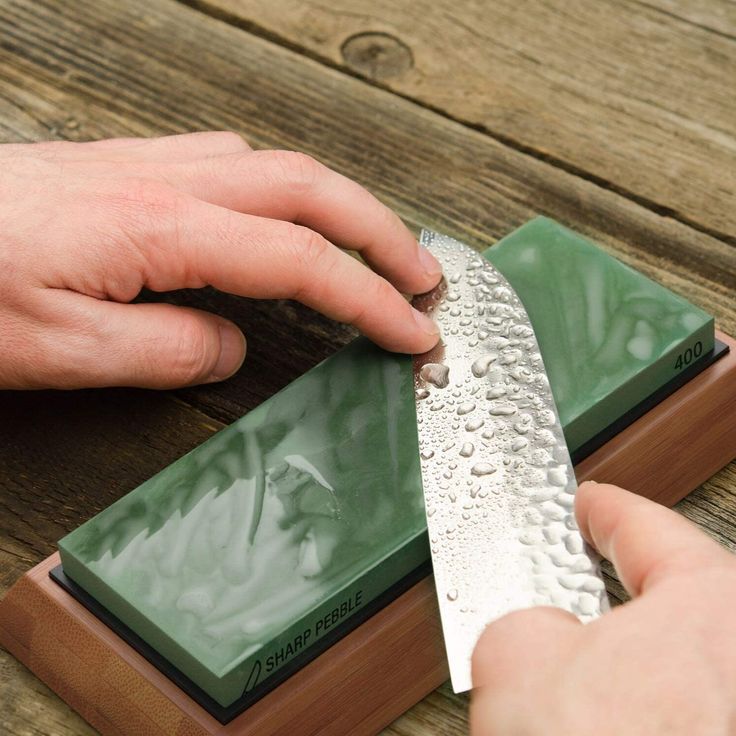
Before sharpening, ensure you have the necessary tools. You will need a whetstone, water or oil (depending on the stone type), a cloth, and a cutting board or stable surface for sharpening. Some people prefer to soak their whetstones in water for about 10-15 minutes before use, especially for water stones.
2. Setting the Angle
The angle at which you sharpen your knife is vital for achieving the right edge. Most kitchen knives require an angle between 15 to 20 degrees. Japanese knives typically need a narrower angle, around 15 degrees, while Western knives may benefit from a 20-degree angle. Use a sharpening guide if necessary to maintain the correct angle while sharpening.
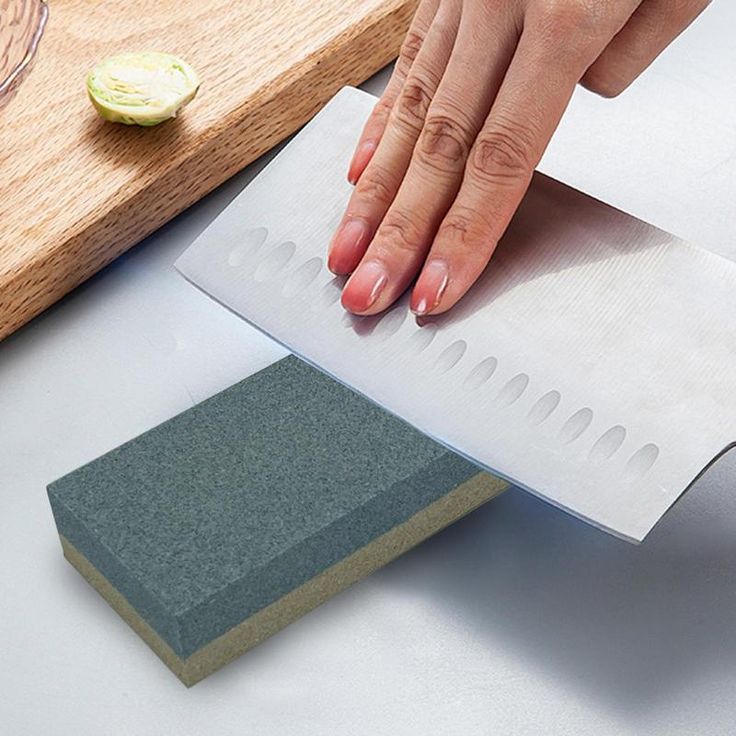
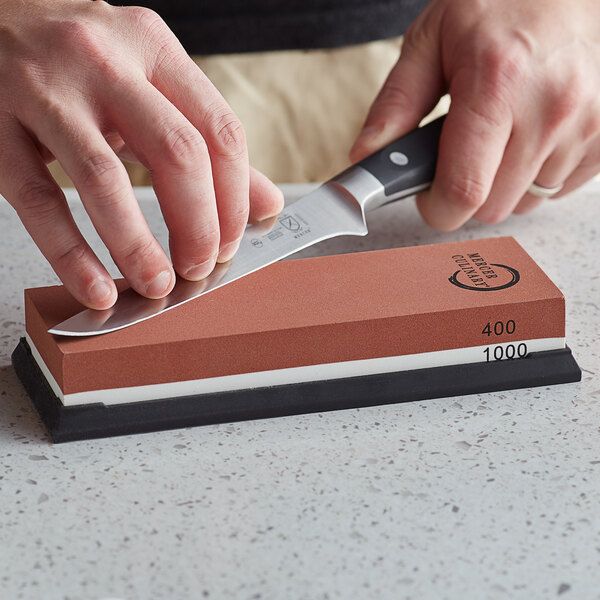
3. Sharpening Process
Start with the coarse grit whetstone if your knife is very dull. Place the blade against the stone and apply light pressure. Drag the knife along the stone, maintaining the angle consistently. Use smooth, even strokes while moving from the heel to the tip of the blade. Repeat this process several times on each side of the knife.
Once you’ve achieved a new edge with the coarse grit, rinse the knife and move to the medium grit whetstone. Repeat the same process, refining the edge with consistent strokes. Follow this up with a fine grit whetstone for polishing.
If you are using an ultra-fine grit whetstone, apply even lighter pressure, allowing the stone to finish the edge. Polishing with the ultra-fine whetstone enhances sharpness and produces a shiny, smooth surface.
4. Testing the Edge
After completing the sharpening process, test the knife’s edge on a piece of paper or a tomato. A well-sharpened knife should cut cleanly without tearing or sawing. If it doesn’t perform as expected, you may need to go back and touch up the edge with a finer grit whetstone.
5. Clean and Maintain
After sharpening, thoroughly clean the knife and the whetstone. Wipe the knife with a dry cloth to remove any metal shavings and moisture. If you used a water whetstone, let it dry completely before storing it. Store your whetstone in a cool and dry place, protected from moisture and heat.
Additional Tips for Maintaining Kitchen Knives
- Regular Honing: In addition to sharpening, regularly hone your kitchen knives using a honing steel. This will help realign the blade edge and prolong sharpness between sharpening sessions.
- Proper Storage: Store your knives in a knife block, on a magnetic strip, or in protective sheaths. Avoid throwing them in a drawer, where they can get nicked or dull.
- Use the Right Cutting Board: Opt for wooden or plastic cutting boards, as they are gentler on knife edges compared to glass or ceramic boards.
- Avoid Dishwashing: Do not put your kitchen knives in the dishwasher. The heat and movements can damage the blades and handles, risking degradation of their edge.
- Wipe Clean After Use: Always wipe your knives clean after each use to prevent moisture and food debris from accumulating, which can lead to staining or corrosion.
Common Mistakes to Avoid
When sharpening kitchen knives, it’s easy to make certain mistakes that can hinder the sharpening process. Here are a few to avoid:
1. Applying Too Much Pressure
Many people think applying significant pressure while sharpening will yield better results. However, this can damage both the knife and the whetstone. Use light to moderate pressure for optimal sharpening.
2. Ignoring the Angle
Neglecting the sharpening angle can lead to an uneven edge. Always maintain the correct angle while sharpening to ensure a consistent and effective edge.
3. Skipping Grit Levels
Using only one grit level for sharpening can limit the effectiveness of the process. Start with a coarse grit if necessary, and progress to medium and fine grits for best results.
4. Overlooking Maintenance
Failing to regularly maintain your knives leads to more significant sharpening needs over time. Incorporate routine honing and proper cleaning into your knife care routine to prolong the life of your kitchen knives.
5. Not Testing the Edge
After sharpening, always test the knife’s edge to ensure it meets your cutting needs. It’s essential to verify the results of your sharpening efforts.
Conclusion
Knowing what grit whetstone for kitchen knives is appropriate for your tools is an invaluable skill for anyone who loves to cook. Selecting the right whetstone and understanding grit levels can help you maintain the sharpness of your knives, leading to improved performance and safety in the kitchen.
By following the guidelines provided in this article, you can sharpen your kitchen knives effectively. With practice, you will become more proficient in using different grit stones to achieve the perfect edge for various cutting tasks.
Ultimately, a well-maintained kitchen knife set enhances your cooking experience. By investing time and effort into sharpening and caring for your knives, you will enjoy more efficient and enjoyable food preparation for years to come.