A kitchen knife sharpener serves as an essential tool for maintaining the performance and longevity of your knives. A sharp knife significantly enhances your cooking experience, making food preparation easier, safer, and more efficient. This comprehensive step-by-step sharpening guide will help you understand the intricacies of knife sharpening, enabling you to keep your kitchen knives in optimal condition.
Understanding the Importance of a Sharp Knife
A sharp knife plays a crucial role in the kitchen. First and foremost, it contributes to safety. A dull knife requires more forceful cuts, increasing the likelihood of slips and accidental injuries. Sharp knives glide through food with ease, reducing the risk of accidents and allowing for greater control during cutting. A well-maintained knife also enhances the quality of the cuts you produce, resulting in more aesthetically pleasing dishes.
Moreover, sharp knives improve your efficiency in the kitchen. When your knives are sharp, you not only save time during food preparation but also maintain the integrity of the ingredients. For instance, using a sharp knife when slicing delicate herbs ensures that you do not bruise or crush them, retaining their fresh flavors and vibrant colors. Furthermore, an appropriately sharpened knife can extend its lifespan, making it a valuable investment for any home cook or professional chef.
Getting Familiar with Different Types of Knife Sharpeners
Before diving into the sharpening process, familiarize yourself with the different types of kitchen knife sharpeners available. Each type serves specific purposes and has various advantages.
- Whetstones: Often favored by professionals, whetstones offer a traditional method of sharpening. They require some skill but allow for precise control over the sharpening angle and level of sharpness.
- Electric sharpeners: These devices automate the sharpening process, making them user-friendly for beginner cooks. However, they can produce uneven results and may remove excessive material from the blade.
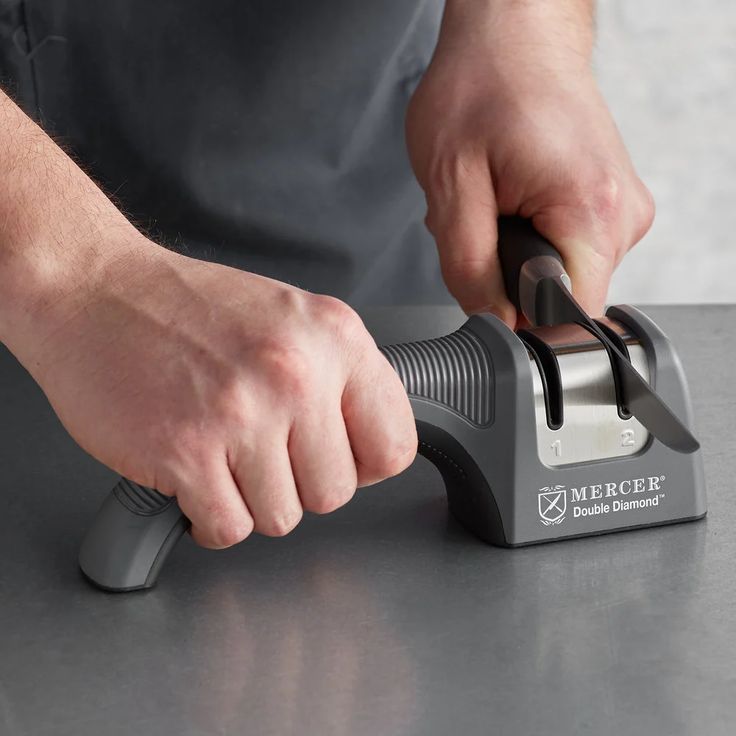
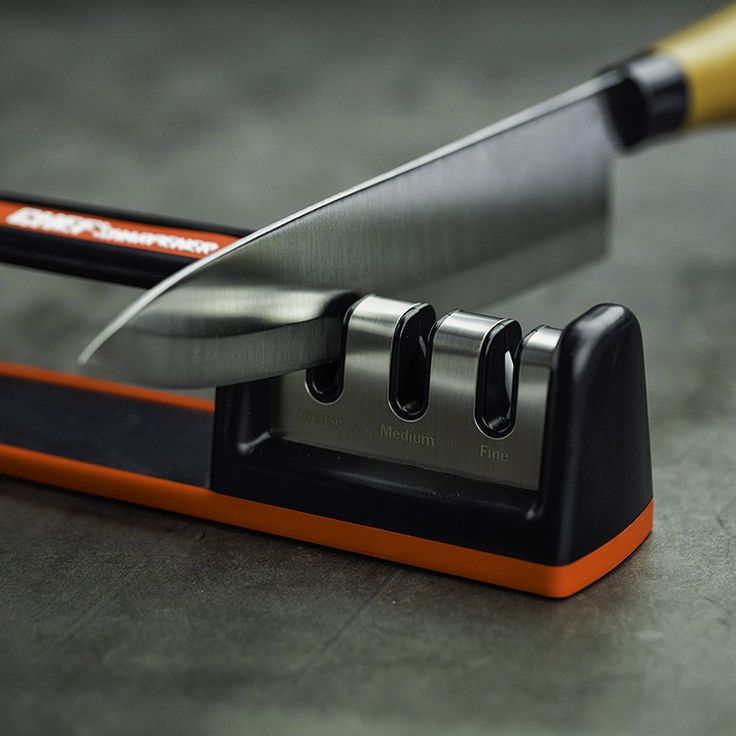
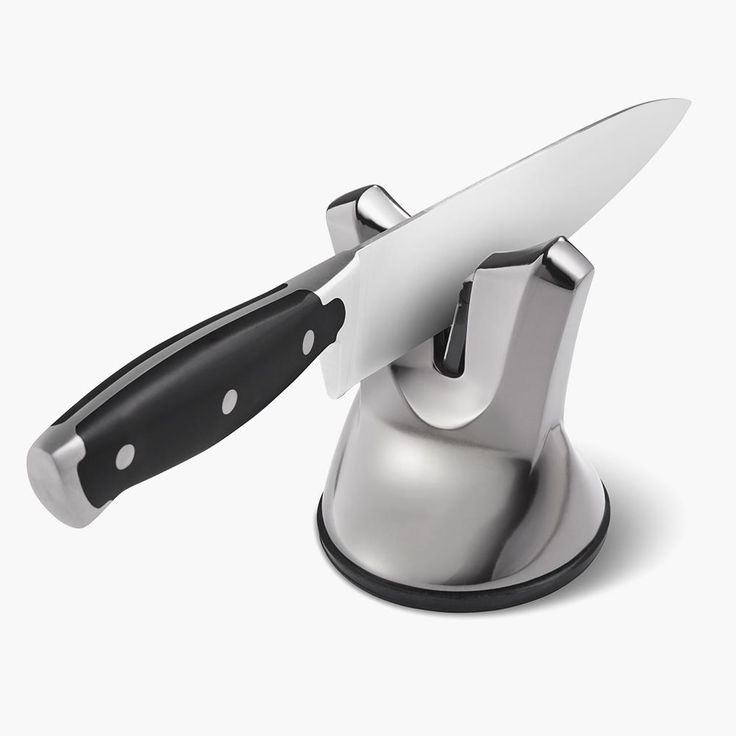
- Manual pull-through sharpeners: These handheld tools provide a quick and convenient way to sharpen knives. While they are effective for touch-ups, they may not offer the same level of precision as whetstones for complete sharpening.
- Honing rods: Often mistaken for sharpeners, honing rods do not sharpen knives but realign the blade’s edge. Using a honing rod regularly can extend the intervals between sharpening but will not replace the need for proper sharpening.
Selecting the right knife sharpener based on your comfort level and how often you cook will help you achieve the best results.
Step 1: Prepare Your Knife and Work Area
Before beginning the sharpening process, ensure you have a clean, stable work area. Lay down a damp cloth or towel to prevent any slippage of the kitchen knife sharpener during the process and to minimize noise. Also, keep your knives and sharpeners organized to maintain efficiency throughout your sharpening session.
Now, inspect your knife for any visible signs of wear, such as nicks or dents along the blade. If you notice chipping or severe damage, you may want to consider professional sharpening services, as these issues require specialized techniques. For regular maintenance or minor dullness, moving forward with the sharpening process will suffice.
Gather your cleaning supplies, such as warm, soapy water, and a dry cloth. Cleaning your knife before sharpening eliminates any food particles or residue that could interfere with the sharpening process. Use the warm soapy water to wipe down the blade, then dry it thoroughly with the cloth. A clean knife ensures a smoother sharpening experience.
Step 2: Choose the Appropriate Sharpening Angle
Selecting the right sharpening angle depends on the type of knife you are sharpening. Most Western-style kitchen knives use a sharpening angle between 20 to 22 degrees. In comparison, Japanese-style knives have a thinner edge and work best with an angle of approximately 15 degrees. Understanding these differences ensures that you will perform an effective sharpening process.
If your knife has a factory edge, you can maintain this angle throughout the sharpening procedure. However, if you have previously sharpened the knife at a different angle, you may want to revert to the original by using a protractor or adjustable angle guide. Knowing the correct angle will allow you to achieve a precise edge, resulting in superior cutting performance.
If you are using a whetstone, hold the knife at the chosen angle against the stone. For electric or manual sharpeners, align the knife according to the built-in guides provided. Following the correct angle will improve the effectiveness of your sharpening efforts and help achieve the optimal sharpness without damaging the blade.
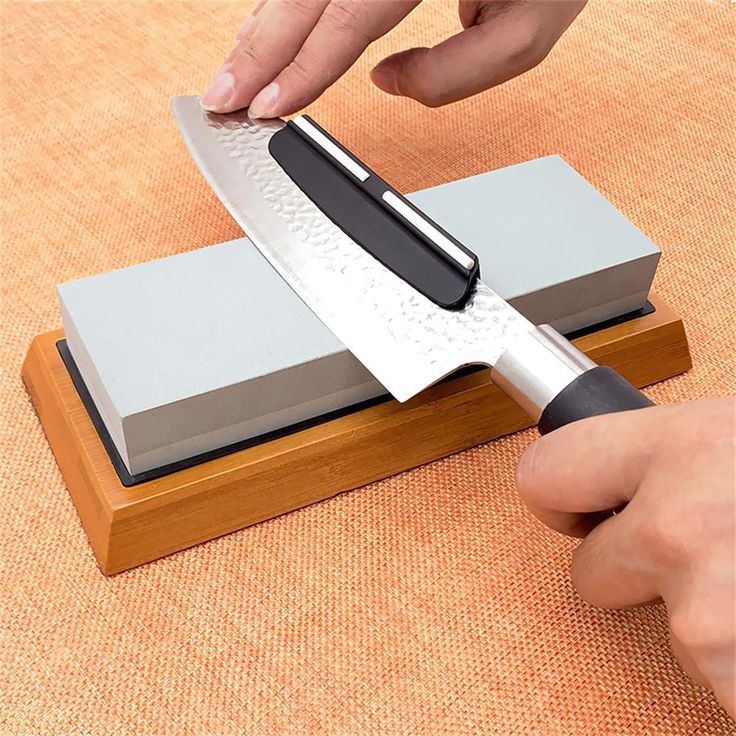
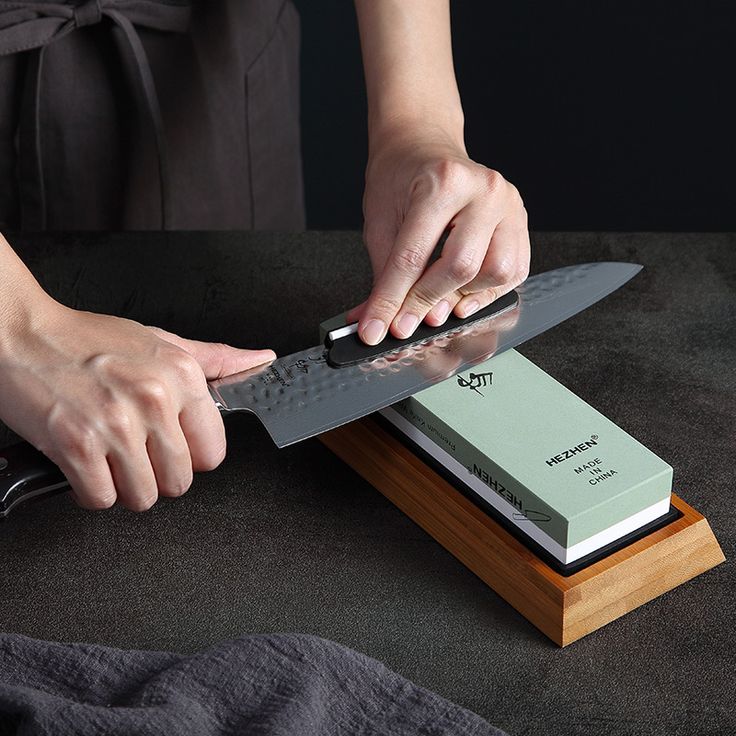
Step 3: Sharpening with a Whetstone
If you have opted for a whetstone, the process begins with soaking the stone in water for about 10-15 minutes. This helps lubricate the surface and prevents excessive friction during sharpening. Once soaked, place the whetstone on a non-slip surface. Grip the handle of your knife firmly but not too tightly, and position the blade against the stone at the previously determined angle.
Start sharpening the knife by gently pushing the blade forward and downward through the stone while applying light pressure. Use a consistent motion, moving from the heel of the blade to the tip, covering the entire edge length. Perform about 5 to 10 strokes on one side, then switch to the other side, repeating the process. Ensure you maintain the correct angle throughout to achieve an even edge on both sides.
After you sharpen both sides, check the blade’s sharpness by carefully testing it on a piece of paper or a tomato. A sharp knife should cut through effortlessly. If the edge doesn’t meet your expectations, perform additional strokes on the whetstone until you achieve the desired sharpness.
Step 4: Using Electric and Manual Pull-Through Sharpeners
When using an electric sharpener, follow the manufacturer’s instructions closely. Generally, these sharpeners feature two or more slots, each designed for a specific grit. Begin with the coarse grit slot, squeezing the handle gently while inserting the knife into the designated opening. Pull the knife through the sharpener with a steady, even pressure. Repeat this step 3 to 5 times, then switch to the finer grit slot to refine the edge further.
For manual pull-through sharpeners, the process is similar but without the electrical components. Simply insert the knife into the appropriate slot and pull it through the sharpener in the same manner. Always follow up with the finer slot to ensure a polished edge.
After sharpening, wipe down the knife with a dry cloth. This removes any metal shavings left from the sharpening process. Proper cleaning of your knife also provides insight into the effectiveness of your sharpening session. If there are still residues, consider running it through the sharpener once more.
Step 5: Honing Your Knife
After sharpening, use a honing rod to establish proper alignment of the blade’s edge. Honing does not sharpen but instead aligns the microscopic teeth along the edge that might have become misaligned during use. Hold the honing rod vertically and position the knife at the correct angle (between 15 and 20 degrees). Start with the heel of the blade against the rod and glide it down to the tip in a sweeping motion. Repeat this process for each side of the blade about 5-7 times.
Regular honing is crucial to maintaining your knives’ sharpness and can reduce the need for frequent sharpening. Incorporating honing into your kitchen routine allows you to preserve the quality of your knives over time, making them more efficient for tasks that require precision and control.
Step 6: Cleaning and Storing Your Knives Properly
After sharpening and honing, take time to clean your knife again. Wipe it down with warm, soapy water and dry it thoroughly. Proper cleaning is vital to ensure that no metal residue or sharpening stone grit remains on the blade. Doing so helps maintain knife performance and prevents rusting or staining.
When it comes to storage, choose a knife block, magnetic strip, or blade guards to prevent the edges from dulling or becoming damaged. Avoid storing knives in drawers without protection, as this can lead to nicks and dents over time. Proper storage of sharp knives not only preserves their sharpness but also enhances safety in the kitchen.
Final Thoughts: The Art of Knife Sharpening
Mastering the art of knife sharpening is an invaluable skill for any cook. Utilizing a kitchen knife sharpener improves your efficiency in the kitchen and ensures your knives remain in superb condition. By following this step-by-step guide, you can enhance your cooking experience and achieve better results with every meal. Always keep your knives sharp, as doing so contributes to safer, more efficient cooking, reducing the risk of accidents.
Investing time in learning various sharpening methods, including the use of a kitchen knife sharpener, helps you understand the significance of regularly maintaining your tools. As you develop your skills, you will notice a marked improvement in your precision and ease while preparing meals. Ultimately, sharp knives elevate your kitchen game and inspire confidence in your culinary abilities, allowing you to explore new recipes and techniques with enthusiasm.